
Last Updated: July 5, 2026
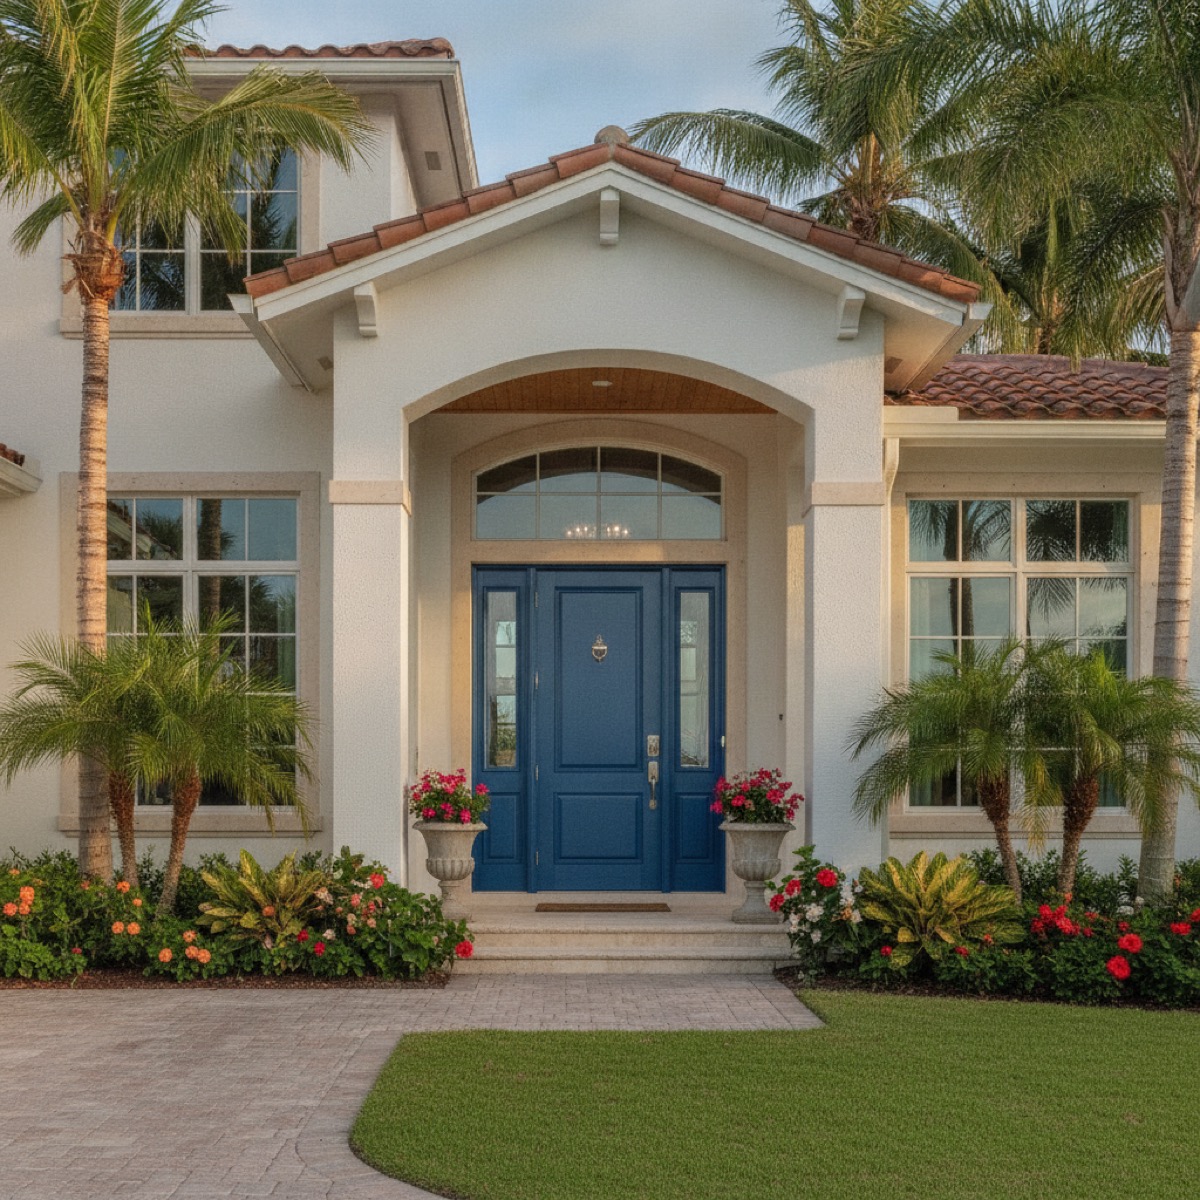
Your entry sets the tone for your whole home. A fresh coat can transform a tired entryway into a pristine focal point that boosts curb appeal instantly. If you want to tackle this project the right way, you are in the right place.
At JPL Painting, we help homeowners across Volusia County revitalize their entryways with meticulous, Florida-tough finishes. Our heat, humidity, and salt air demand a specific approach that generic guides skip. We live and work in New Smyrna Beach, so we know what holds up.
This guide walks you through every step. You will find the exact process we use for a flawless, lasting result.
Table of Contents
- Why This Project Matters
- Gather Your Materials
- Choosing the Right Door Paint
- Select the Best Finish
- Prep the Surface
- Remove or Tape the Hardware
- Sanding for a Flawless Surface
- Clean After Sanding
- Apply Primer for Lasting Adhesion
- Brush vs Roller: Which Works Better
- Work Without Removal
- Do You Coat the Edges
- Tackling a Steel Entry
- Working on a Wooden Surface
- Coating Over Existing Layers
- Apply Light Layers for a Flawless Result
- Common Mistakes to Avoid
- Curing Time and Maintenance
- Frequently Asked Questions
- Trust JPL Painting With Your Entry
Why This Project Matters
A well-finished entry does more than look good. It protects your door from UV damage, moisture, and daily wear. In Florida, the sun beats down on your entryway most of the year. Without proper protection, surfaces crack and rust.
This is one of the simplest upgrades with the highest return. A custom shade can transform your home's appearance for a modest investment. The right paint choice makes all the difference. Check our painting tips blog for more homeowner advice.
Gather Your Materials
Before you start, gather everything you need. Running to the hardware store mid-project interrupts your momentum and affects quality.
Your checklist:
- Premium acrylic latex formula (a trusted brand works best)
- Sealer compatible with your surface
- 2-inch angled tool for recessed panels
- 4-inch foam sleeve with a fine nap
- Sandpaper in 120 and 220 grit
- Tack cloth or microfiber rag
- Painter's tape
- Drop cloth
- Screwdriver for hardware
- Mineral spirits or degreaser
A quality bristle tool holds more material and releases it evenly, which reduces streaks.
Choosing the Right Door Paint
Not all formulas work for an outdoor surface. You need one designed to handle sun, rain, and temperature swings.
For most entries, we recommend a premium 100% acrylic latex formula. It expands and contracts with temperature changes, which prevents cracking. This brand offers excellent options for Florida conditions.
If your entry gets direct afternoon sun, look for UV-resistant formulas. Dark shades absorb heat and fade faster without protection.
Select the Best Finish
The finish affects both appearance and durability.
- Semi-gloss: Most popular for entries. Easy to clean and reflects light beautifully.
- Satin: Softer sheen that hides imperfections well.
- High-gloss: Dramatic but shows every flaw.
We typically recommend a high-sheen option for outdoor surfaces. It stands up to Florida humidity and wipes clean after storms.
Prep the Surface
Preparation determines your final result more than any other step. Even the best product fails on a poorly prepped surface.
Remove dirt, grease, and old flaking material. Use a degreaser on steel surfaces. For wooden entries, a light wipe with a damp cloth works well.
Scrape off peeling sections with a putty knife. Sand the edges of remaining coats until the surface feels uniform.
Our pressure washing service can prep your whole home before a larger project.
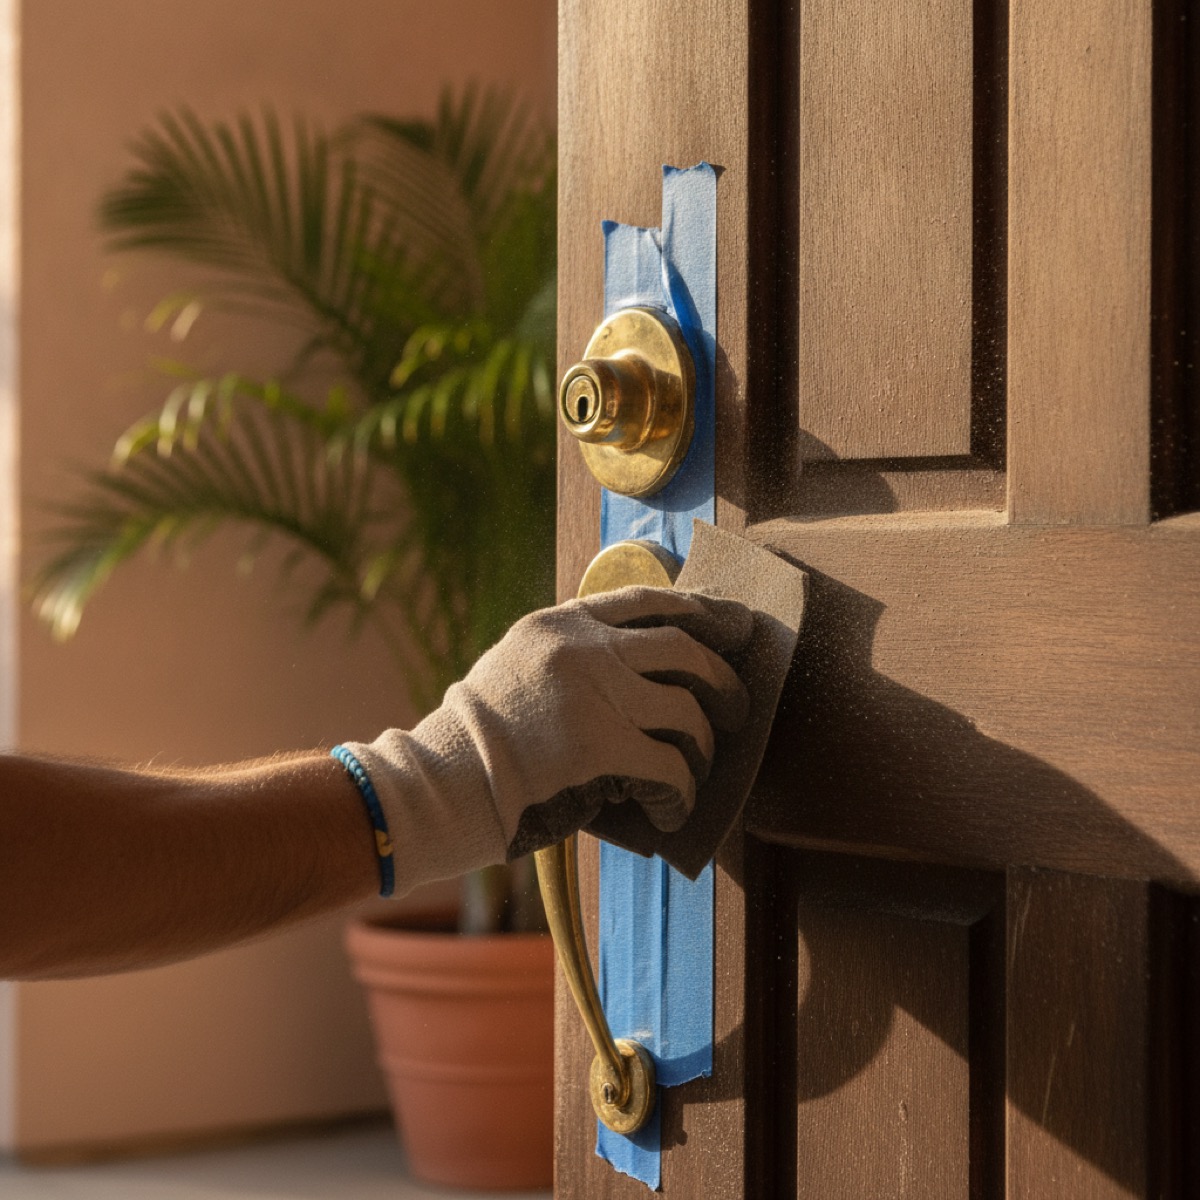
Remove or Tape the Hardware
Take off the knob, knocker, hinges, and any other hardware if possible. This gives full access to every surface and produces cleaner results.
If removal is not an option, tape around each piece carefully. Use high-quality painter's tape and press edges down firmly to prevent seepage.
Remove the tape while the final coat is still slightly wet. Pulling it off after drying can peel the new finish.
Sanding for a Flawless Surface
Sanding creates a surface the base coat and topcoat can grip. Skip this and you risk peeling within months.
For a bare surface, sand with 120-grit to open it up. Then follow with 220-grit for a finer feel. Light sanding is all you need on an entry in decent shape.
Always sand in the direction of the grain. Going against it leaves scratches that show through.
Clean After Sanding
Sanding leaves dust behind. Coat over dust and you get a rough, uneven surface.
Wipe everything down with a tack cloth or microfiber rag. Work top to bottom so dust falls away from cleaned areas. Pay attention to recessed panels where dust collects.
For steel surfaces, wipe with a cloth dampened with mineral spirits. This removes dust and oils that interfere with adhesion.
Apply Primer for Lasting Adhesion
Primer creates a bond between the surface and your topcoat. It seals and helps everything adhere properly.
Use a product matched to your material. Wooden entries benefit from an oil-based or acrylic base coat. Steel needs a rust-inhibiting formula.
Apply with a bristle tool on recessed panels and a foam sleeve on flat areas. Work in thin, even layers. One coat usually covers, but a second helps on bare surfaces or dramatic shade changes.
Let it dry completely before moving on. Rushing ruins the bond you just created.
Brush vs Roller: Which Works Better
Homeowners often ask whether a bristle tool or foam sleeve works better. The answer is both.
Use a bristle tool for recessed panels, edges, and detailed areas. A 2-inch angled brush reaches into corners cleanly. Use a foam sleeve for flat sections to apply material evenly.
This combination produces a smooth finish with minimal streaks. For entries with flat panels, the sleeve alone can work well.
Want a Flawless Front Door Without the Hassle?
Our trim and door experts deliver clean, precise, on-time results across Volusia County. Call us for a free estimate.
(386) 576-4730Work Without Removal
You can tackle this project without removing the entry from its hinges. Many homeowners prefer this to avoid rehanging a heavy slab.
Follow this process:
- Open the entry and tackle the hinged edge first
- Coat the inside face
- Close it and tackle the outside face
- Handle the top and bottom edges last
- Let each section dry before moving on
Work in sections so you can close it while one side dries. This keeps bugs and dust off wet surfaces.
Our trim and door refinishing service handles this with precision if you prefer professional results.
Do You Coat the Edges
Yes, always coat the sides and edges. The top and bottom need protection too.
Uncoated edges absorb moisture, which causes swelling on wooden surfaces and rust on metal. In Florida's humid climate, this happens faster than you expect.
Coat the hinged edge to match the inside. Coat the latch edge to match the outside. This keeps everything consistent when opened or closed.
Tackling a Steel Entry
Steel entries require a different approach. The key is proper prep and the right base coat.
Clean thoroughly with mineral spirits. Remove any rust with sandpaper or a wire tool. Apply a rust-inhibiting base coat to bare spots.
Use a foam sleeve for flat sections since steel usually has a smooth face. Follow with a bristle tool on recessed areas and edges.
The best formula for these surfaces is a premium acrylic latex option. It resists fading and stands up to Florida sun without chalking.
Working on a Wooden Surface
Wooden entries have character and grain that add warmth. They also need more attention to detail.
Fill any dents or holes with filler before sanding. Sand everything smooth, working with the grain. Apply an oil-based or acrylic sealer to seal the wood.
For these surfaces, a bristle tool often produces better results than a sleeve. It works material into the grain and panels where foam cannot reach.
Paint recessed areas first. Then tackle the flat sections for an even finish.
Coating Over Existing Layers
You can coat over a surface that already has material on it. The existing layer just needs to be in decent condition.
Check for peeling, bubbling, or cracking. Scrape off loose sections and sand edges smooth. If existing material is sound, a light scuff is enough.
Clean well after sanding. Apply sealer if making a dramatic shade change or switching product types. For minor shifts, you may skip it.
Coating outdoor surfaces with existing material follows the same process. The prep just focuses on creating a stable base.
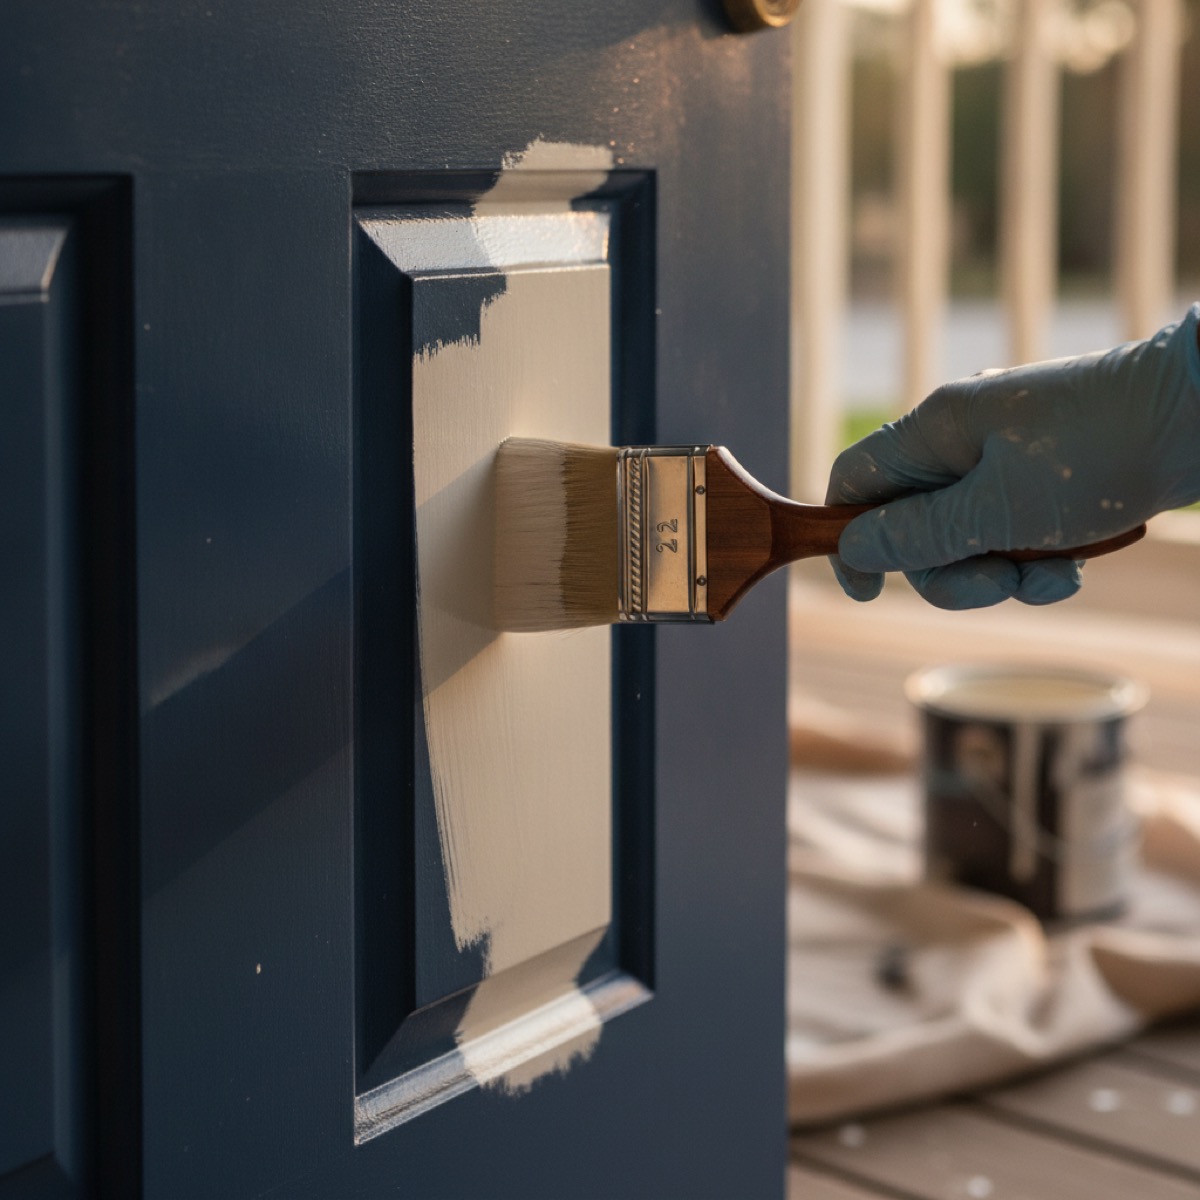
Apply Light Layers for a Flawless Result
The secret to a flawless finish is thin coats. Resist the urge to load on thick layers to save time.
Thick material runs, sags, and takes longer to dry. Thin layers dry evenly and build a smoother surface. Quality paint flows better when applied in light passes.
Apply two to three light layers instead of one thick one. Wait for each to dry before adding the next. This patience pays off in a finish that looks custom.
Sand lightly between coats with 320-grit if you feel any roughness. Wipe away dust before continuing.
Common Mistakes to Avoid
Even experienced DIYers make errors. Here are the most common ones:
- Skipping base coat, which leads to peeling
- Working in direct sun, which dries material too fast
- Using low-quality tools that leave bristles and streaks
- Ignoring humidity, which slows drying and affects adhesion
- Not sanding, which reduces adhesion on glossy surfaces
- Applying thick layers that run and sag
Check our guide on the best temperature to paint outside before you pick a day.
Curing Time and Maintenance
Dry time and cure time differ. Material feels dry in hours, but full curing takes longer.
Latex formulas typically cure in two to four weeks. Keep the entry from sticking by avoiding full closure for the first 24 hours.
To maintain your finish:
- Clean twice a year with mild soap and water
- Inspect for chips after storms
- Touch up damaged spots promptly
- Avoid harsh cleaners that strip the surface
A well-maintained front door can look great for five to seven years in Florida. Our exterior services keep your whole home protected.
Frequently Asked Questions
Trust JPL Painting With Your Entry
A truly flawless result takes skill, patience, and the right materials. If you want a pristine, lasting finish without the hassle, we are here to help.
At JPL Painting, we deliver clean, precise, on-time results for homeowners across Volusia County. We exclude Daytona Beach, Port Orange, and Ormond Beach, but we proudly serve New Smyrna Beach and nearby communities.
From exterior refinishing to trim and door work, our team handles every project with meticulous care. Florida weather tests every finish, and we build ours to last.
Ready to transform your entryway? Call us today at (386) 576-4730 or visit our homepage to schedule your free estimate.